This is part 3 of a series where I am demonstrating how we can auto generate a JMeter test plan using Geb and then automatically perform correlation using a groovy script. Part 1 focussed on integrating Geb with JMeter so that we could record the browser traffic generated by our automated tests. Part 2 covered performing some initial correlation to establish what dynamic information we would need to correlate. Part 3, this article, will cover developing the Groovy script to automatically correlate the JMeter test plan should we need to re-record it or record new ones.
Git Repository
A git repository is available containing all the files used in this blog series: here
Post Processing
Writing a Groovy script will enable us to programmatically parse the recorded JMeter test plan and replace specific recorded values with variable names from the regular expression extractors we developed in Part 2 of the series. We build into the script, the ability to parameterise the correct request parameters with variable names for our Regular Expression Extractors. The Groovy script in its entirety can be found here: src/main/groovy/TestPlanParameteriser.groovy
Note that when we run this script, we run it from the groovy directory, NOT from the project root (this should probably be wrapped in a Gradle task). All file paths in the script are relative to this directory.
Breaking down the script.
The first steps in this script read in the recorded test plan and the test plan template .jmx files:
      Node test_recording = new XmlParser().parse('../resources/Recording.Template.jmx')

    Node test_template = new XmlParser().parse('../resources/TestPlan.Template.jmx')

    Node test_plan = test_template
The next stage once we have read in the test plan is to iterate through the 'elementProp' nodes and find the 'url' value node. Once we have found it, we replace the recorded value with a reference to the RESULT_URL variable we created using the Regular Expression Extractor in Part 2:
    test_recording.'**'.findAll { elementProp ->
        elementProp.@name == 'url' }.each {
        it.'**'.findAll { stringProp ->
            stringProp.@name == 'Argument.value' }.each {
              println 'stringProp: parameterising value: '+it.value()
            it.children()[0] = '${RESULT_URL}'
        }
    }
The next stage after replacing all the values we wish to replace is to read out the recorded samples from our recorded script, ready to write into a new test plan containing all our post processors.
    Node test_plan_recorded_transactions = test_recording.hashTree.hashTree.'**'.find { node ->
        node.name() == 'RecordingController'
    }.parent()

    //find the hashTree element that actually stores the recorded transactions for the recording controller and return the Transaction Controller elements and associated hashTree elements
    NodeList test_plan_transactions = test_plan_recorded_transactions.'**'.find { node ->
         node.name() == 'hashTree'
     }.children()[1].children()
Once we have read the samples, the next step is to actually put them into the new test plan.
    test_plan_transactions.each { it ->
        test_plan.hashTree.hashTree.'**'.find { node ->
            node.name() == 'RegexExtractor'
        }.parent().append(it)
    }
Once the samples have been added to the test plan, we need to write it to a file so we can actually open it with JMeter!
    File testPlan = new File('../../test/jmeter/TestPlan.Parameterised.jmx')

    def printer = new XmlNodePrinter(new PrintWriter(new FileWriter(testPlan)))
    printer.preserveWhitespace = true
    printer.print(test_plan)
Putting It All Together
We are ready to record our script as we did in Part 1, then run our groovy script to perform the correlation and then replay, to prove it works.
- clone the project and navigate to the root of the project on the command line.
- Run the following command: gradlew jmGui -Precord - jmeter should now be open.
- Navigate to the Workbench.
- Select HTTP(S) Test Script Recorder and click Start.
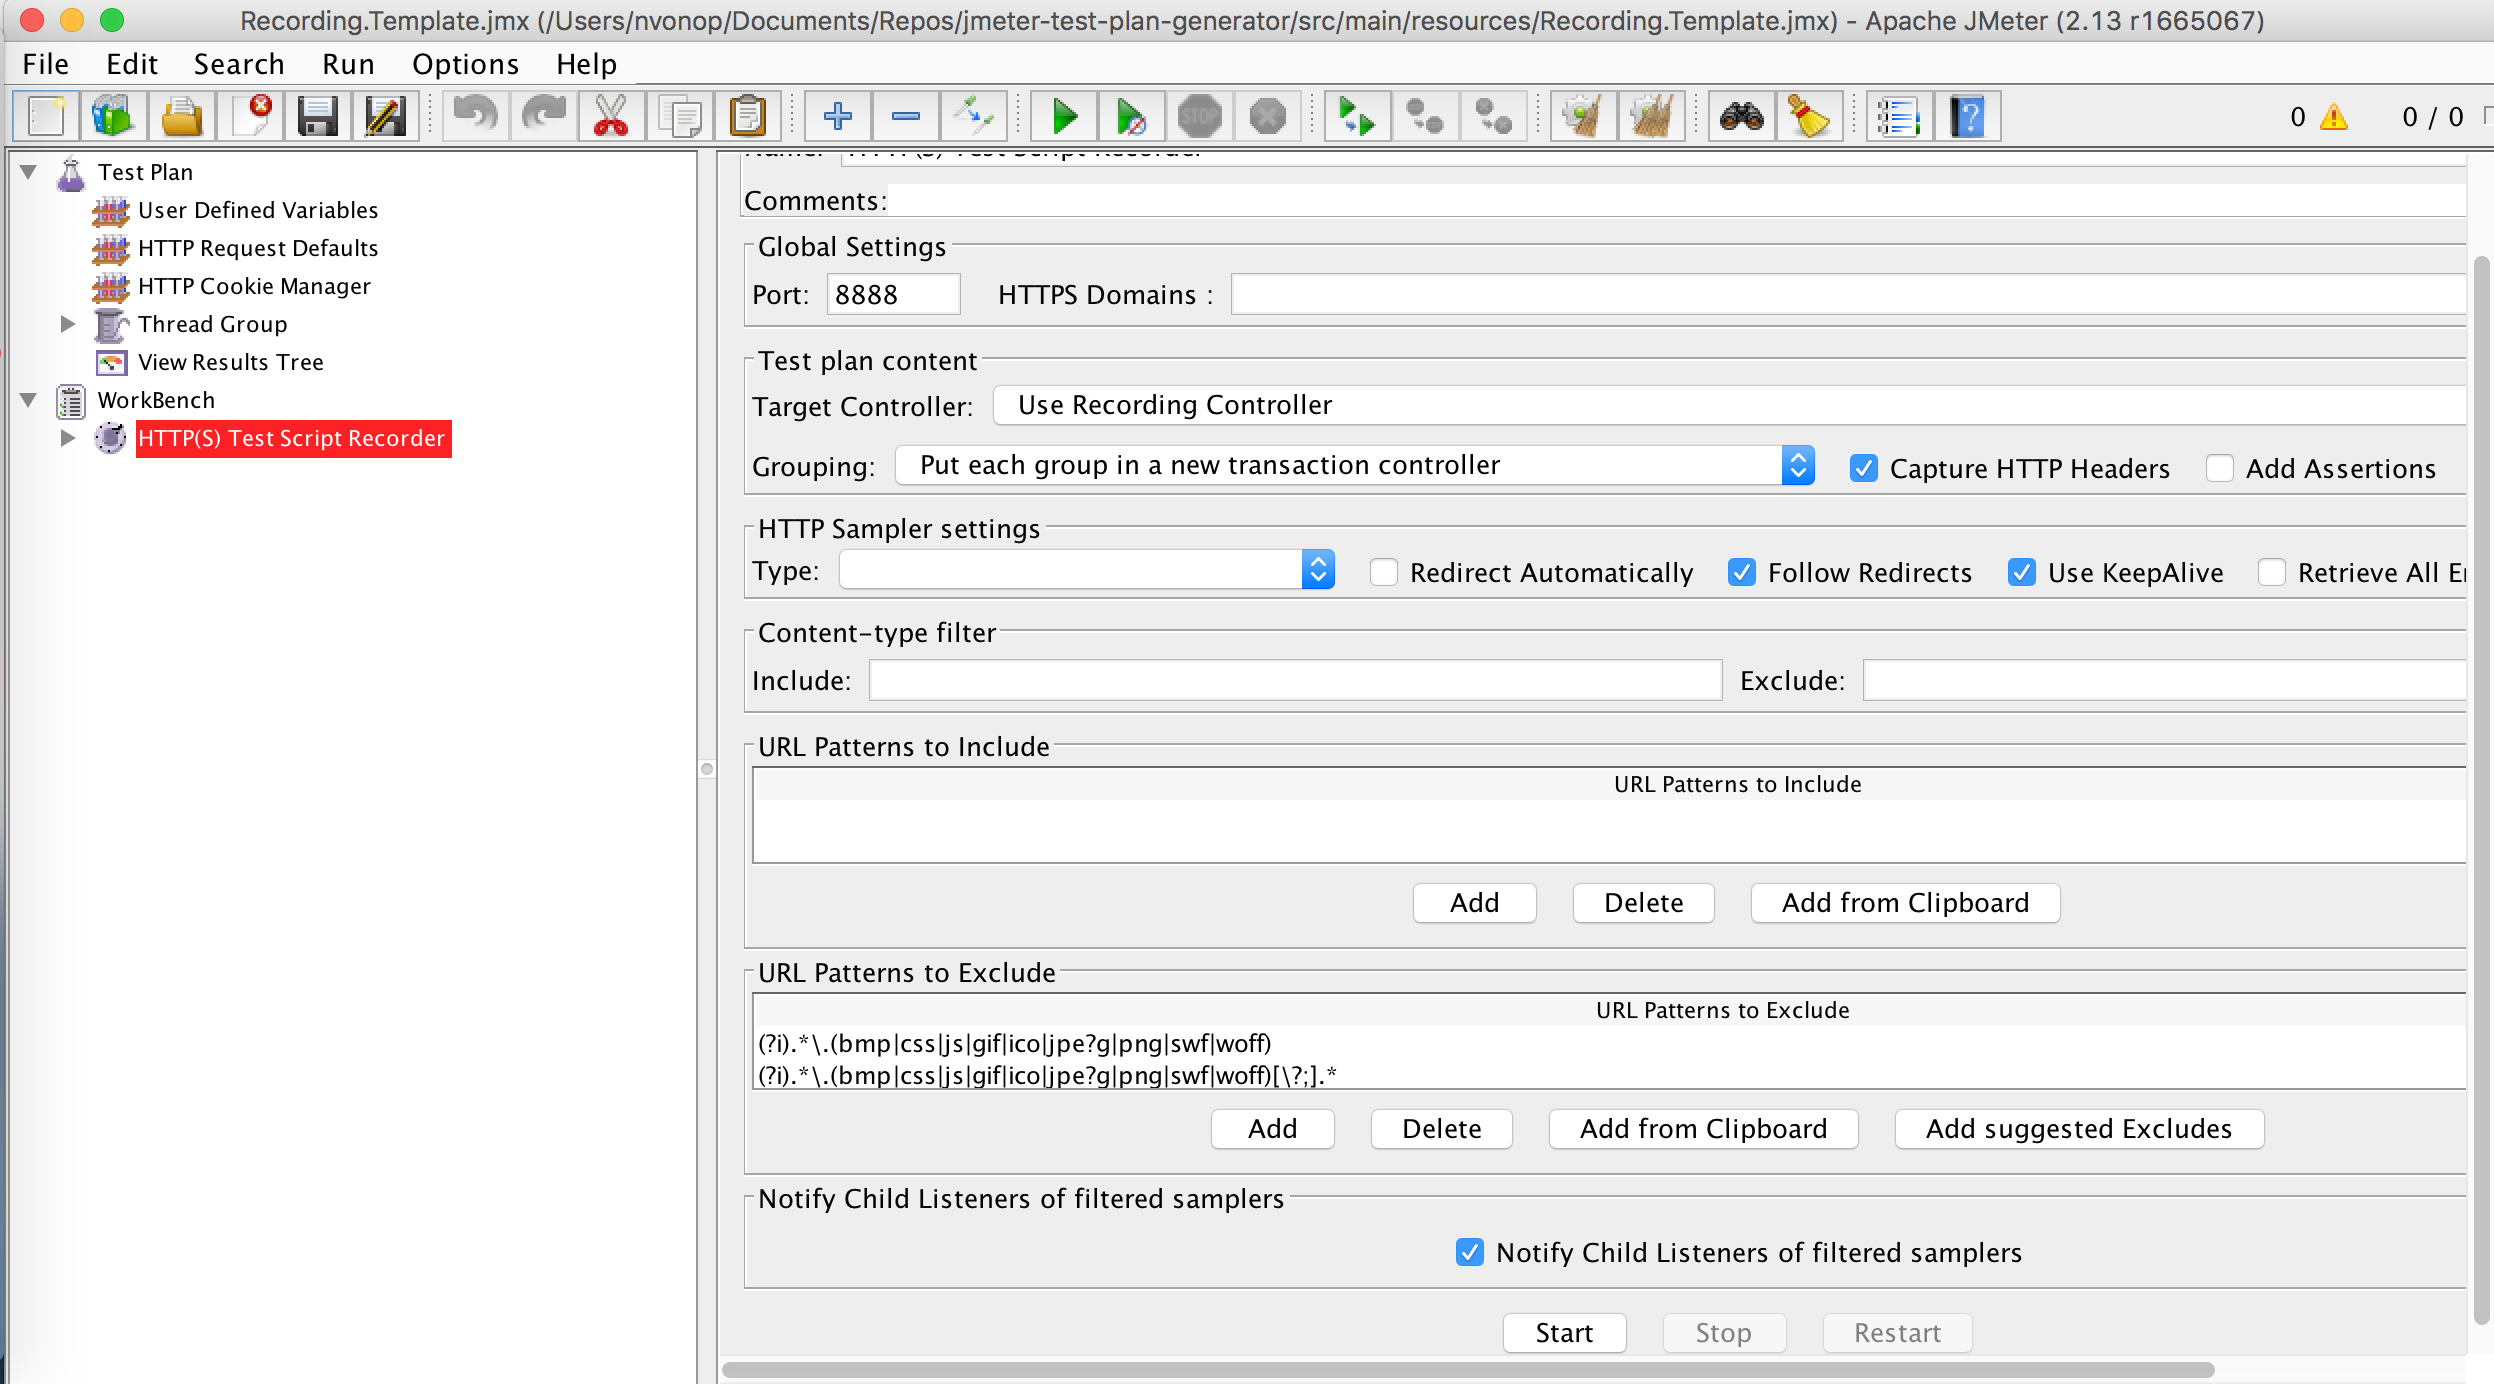
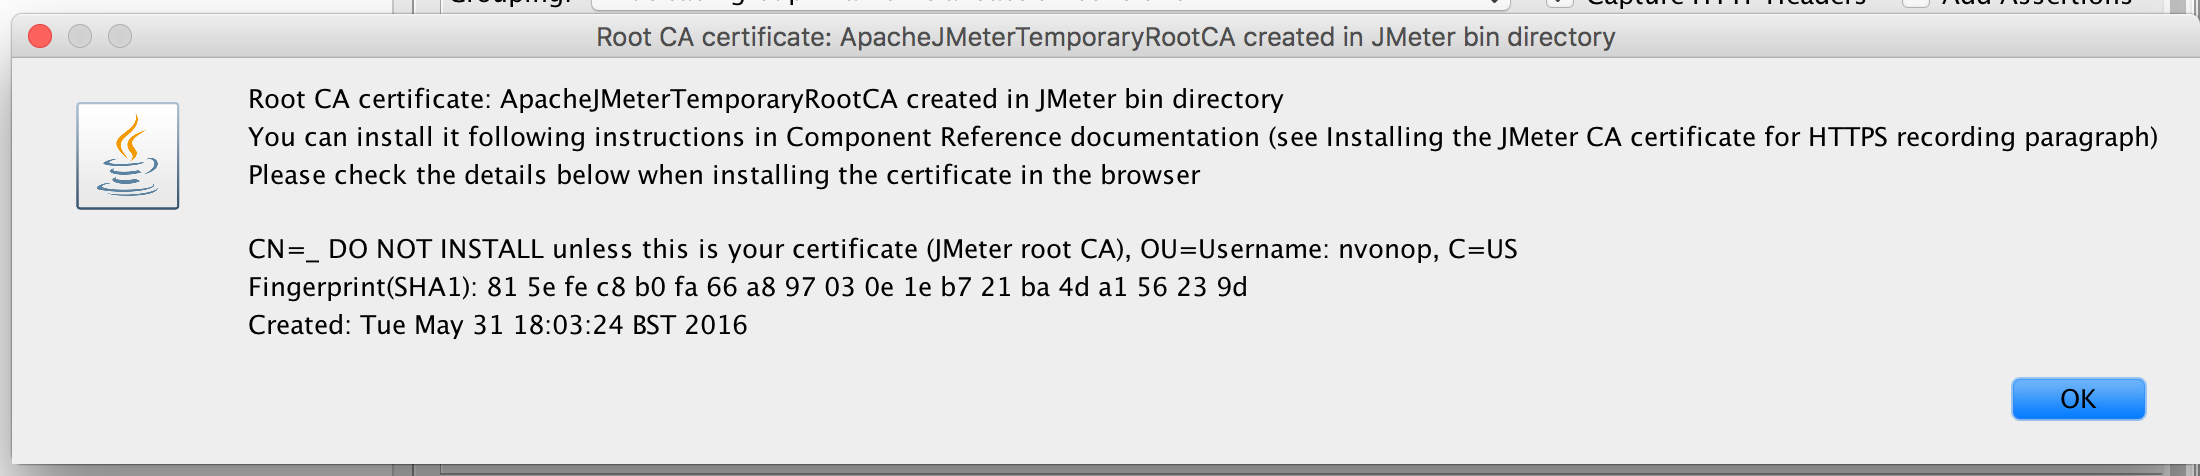
- Click Ok on the Root CA Certificate popup
- You are now ready to start recording traffic from an automated test.
- Open another command prompt and navigate to the root of the project folder again.
- Run gradlew firefoxJmeterTest - Firefox should open and run the demo test against Google.
- Once the test has finished, switch to JMeter and view the transactions that have been recorded under the Recording Controller and click Save.
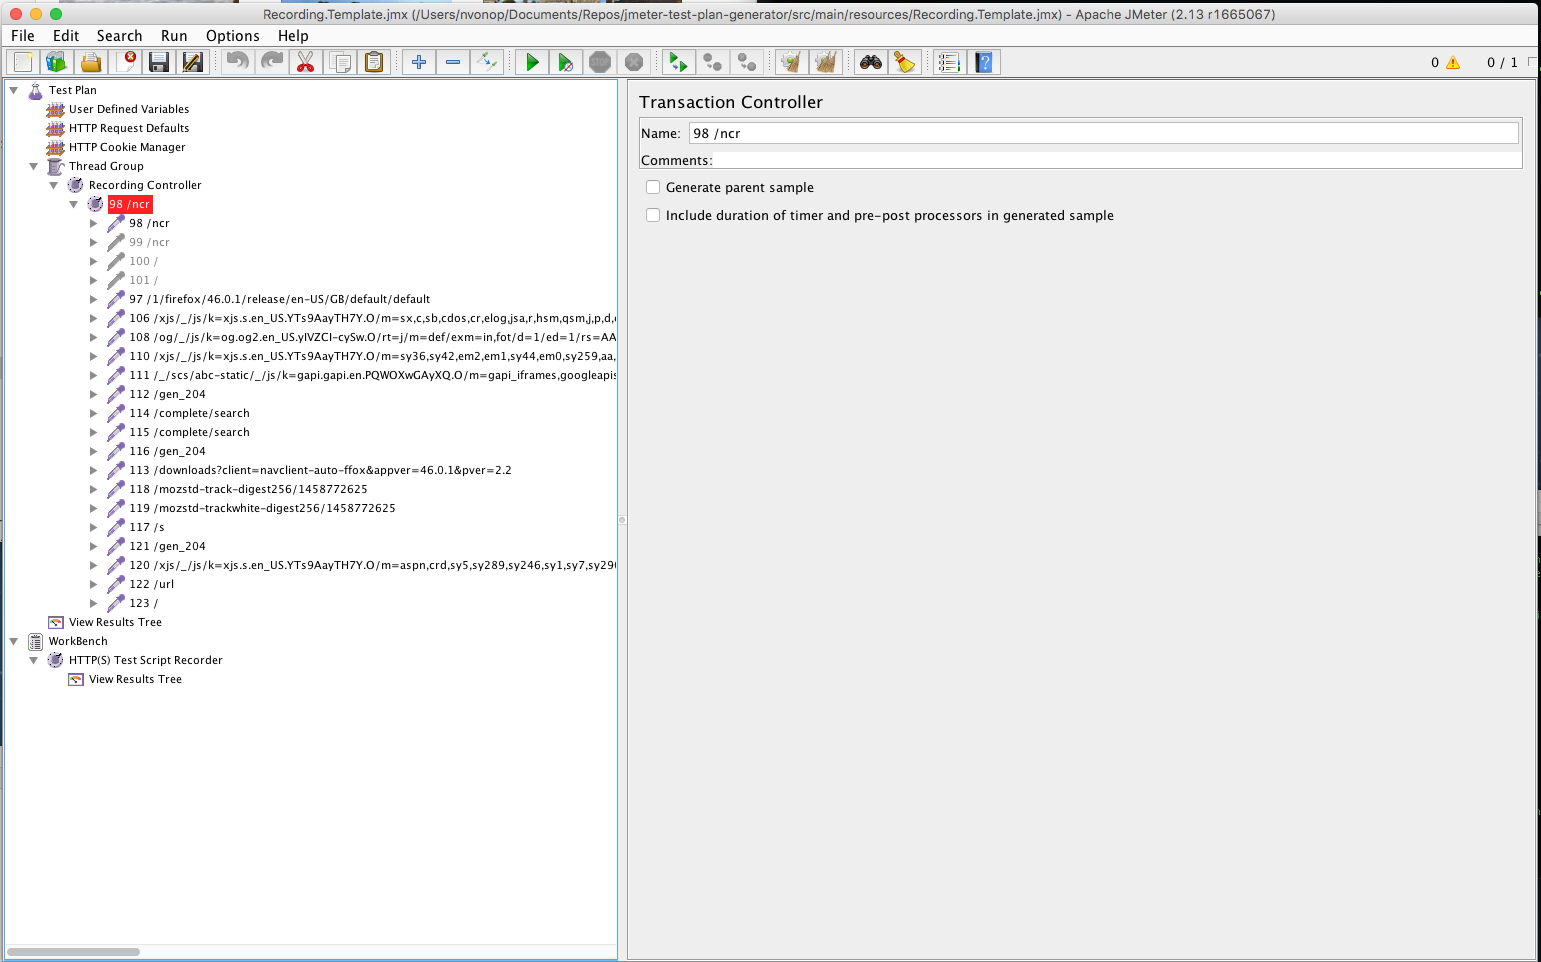
- The test plan is now ready for correlation
- Switch back to the command line and change directory to src/main/groovy
- Run groovy TestPlanParameteriser.groovy
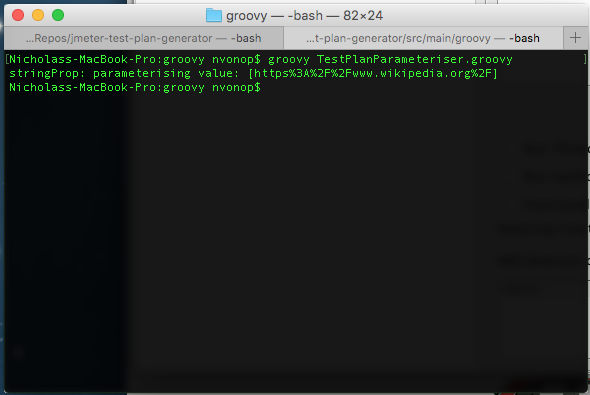
- In JMeter, open src/test/jmeter/TestPlan.Parameterised.jmx and press play. You should be able to see the test plan run back with no issues, and go to Wikipedia.org.

Summary
Using a Google search example is rather basic, but when you are doing this on something much more complex e.g. policy management system, large customer ordering system etc, you can quickly generate meaningful performance tests from automated functional tests. The small upfront investment in writing a script to perform the correlation and creating some test plan templates will rapidly increase your ability to generate JMeter Test Plans quickly.
In terms of maintaining the test scripts you generate to handle changes in the application, don't bother. Simply maintain your automated tests and just record new JMeter Test Plans when necessary!